What Is a JSA in Construction? A Practical Guide

A Job Safety Analysis (JSA) is a short, task-level hazard review that identifies risks and assigns controls before a crew starts work. You’ll also hear it called a Job Hazard Analysis (JHA) — both terms are used interchangeably across U.S. construction, and OSHA treats them as equivalent. The core purpose is simple: break a job into its individual steps, spot what could go wrong at each one, and decide how to control those hazards using the hierarchy of controls before anyone picks up a tool. OSHA’s General Duty Clause requires employers to provide a workplace free from recognized hazards, and a properly completed JSA is one of the clearest ways to demonstrate that obligation is being met.
Table of Contents
- What does a JSA in construction actually include?
- Why JSAs matter on construction projects
- What does OSHA actually require for JSAs?
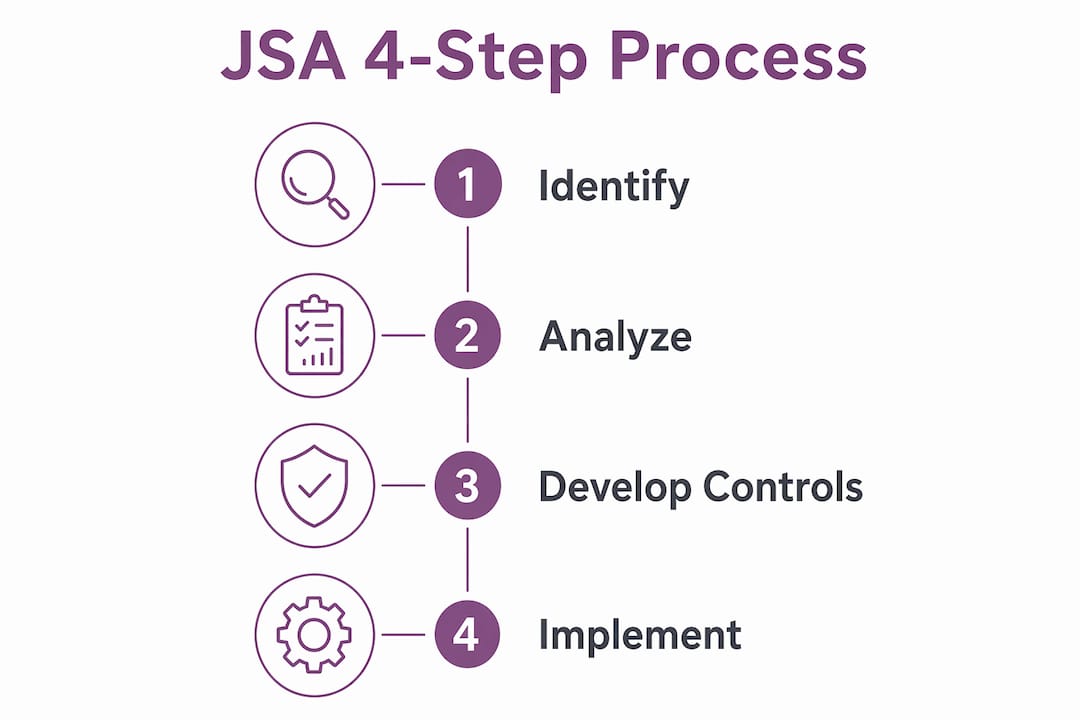
- How to conduct a JSA: the 4-step process
- A concrete JSA example: trenching task
- How to document, store, and update JSAs
- Who should complete a JSA, and when?
- Common construction hazards your JSA should address
- Practical tips and common mistakes to avoid
- Digital tools and templates for JSA documentation
- Why worker involvement and the hierarchy of controls improve JSA outcomes
- Key Takeaways
- The JSA conversation nobody talks about
- Authoritative sources, templates, and downloads
What does a JSA in construction actually include?
A JSA is more than a form. It’s a structured record of how a specific task will be performed safely, and every field on it serves a purpose. Because there is no single standardized JSA form across the industry, organizations adapt the layout to their needs, but the core content stays consistent.
A standard one-page JSA typically includes these fields:
- Job/task description: What work is being done, where, and under what site conditions
- Date, time, and location: When and where the JSA applies
- Step-by-step task breakdown: Each discrete action in the sequence, numbered
- Hazard per step: What could go wrong at that specific step (not general hazards)
- Control measures: How each hazard is addressed, referenced to the hierarchy of controls
- PPE required: Specific equipment, not just “wear PPE”
- Responsible person: Who owns each control or verification action
- Crew signatures: Every worker who reviewed and understood the JSA before starting
- Supervisor/foreman sign-off: Confirmation that controls are in place
For a deeper look at how these fields map to OSHA expectations, the JHA form guide for compliance managers covers field structure in detail. The key distinction between a useful JSA and a weak one is specificity: “use caution” is not a control; “install guardrail at leading edge before advancing deck” is.
Why JSAs matter on construction projects
The most direct benefit is fewer incidents. When crews walk through a task before starting, they catch sequence conflicts, tool incompatibilities, and environmental hazards that don’t show up in a general site safety plan. That pre-task conversation is where the real value lives.
Beyond risk reduction, JSAs improve role clarity. Every crew member knows which hazard they’re responsible for controlling and what the verification step looks like. That alignment cuts down on the “I thought someone else was handling it” moments that precede a lot of near-misses.
JSAs also protect schedule. An incident stops work, triggers an investigation, and often pulls equipment and personnel off-site for days. A 15-minute JSA session before a high-risk task is a fraction of that cost.
OSHA’s guidance on job hazard analysis makes clear that a JHA/JSA is “a proactive, ongoing process to identify and assess hazards” — not a one-time form. The emphasis is on the process and the pre-task conversation, not the paperwork.
From a compliance standpoint, a signed JSA is evidence of due diligence. If an incident occurs and OSHA investigates, a documented JSA showing that hazards were identified and controls were assigned before work began carries significant weight. A blank form filled out after the fact carries none.
What does OSHA actually require for JSAs?
OSHA does not have a single regulation that says “you must complete a JSA.” What it does have is the General Duty Clause (Section 5(a)(1) of the OSH Act), which requires employers to provide employment free from recognized hazards that are causing or likely to cause death or serious physical harm. A JSA is one of the most direct ways to satisfy that standard for task-level work.
Several specific OSHA standards also explicitly require hazard analysis. The Bloodborne Pathogens standard and the Personal Protective Equipment standard (29 CFR 1910.132) both require a hazard assessment before work begins. In construction, standards covering excavation, scaffolding, fall protection, and confined space entry all carry implicit or explicit requirements for pre-task hazard evaluation that a JSA satisfies.
The practical takeaway: for high-risk, non-routine, or changing tasks in construction, a JSA is effectively required. OSHA’s OSHA3071 publication on job hazard analysis is the foundational reference document and worth keeping on file.
How to conduct a JSA: the 4-step process
The four-step JSA process is: select the job, break it into steps, identify hazards at each step, and determine controls. Here’s how each step works in practice.
-
Select the job to analyze. Prioritize tasks based on accident history, injury severity potential, frequency of performance, and whether the task is new or recently changed. Non-routine tasks and first-time operations on a site get priority.
-
Break the job into steps. List each discrete action in sequence. A good rule of thumb: most tasks can be described in fewer than 10 steps. If you’re hitting 15 or more, split the task into two separate JSAs. Steps should be action-based (“position ladder against wall”) not outcome-based (“get to the roof”).
-
Identify hazards at each step. For each step, ask: what could injure someone here? Consider the tools being used, the environment (weather, adjacent work, overhead activity), the sequence (what’s happening nearby at the same time), and the physical demands on the worker. Common hazard types include falls, struck-by objects, caught-in/between equipment, electrical contact, and chemical exposure.
-
Determine controls using the hierarchy of controls. Work top-down: elimination first, then substitution, then engineering controls, then administrative controls, and PPE last. A control that removes the hazard entirely is always better than one that relies on a worker remembering to wear a harness.
Pro Tip: Don’t write the JSA at a desk and hand it to the crew. Run the JSA session with the workers who will do the task. They’ll identify hazards you won’t — sequence conflicts, tool limitations, and site-specific conditions that only show up when you’re standing at the work face.
For more on applying best practices at each step, the JHA best practices guide covers common gaps safety professionals miss.
A concrete JSA example: trenching task
Job scope: Excavate a 4-foot-deep, 20-foot-long utility trench in clay soil using a mini-excavator, with two laborers working in the trench.
| Step | Hazard | Control | Hierarchy Level | Responsible |
|---|---|---|---|---|
| 1. Locate underground utilities | Unmarked lines; electrocution | Call 811; verify locates before digging | Administrative | Foreman |
| 2. Set up exclusion zone | Struck-by excavator; vehicle traffic | Install barriers and spotter; no workers in swing radius | Engineering / Administrative | Foreman + Operator |
| 3. Excavate to depth | Cave-in; equipment rollover | Install trench box before entry; verify soil classification | Engineering | Competent Person |
| 4. Workers enter trench | Cave-in; engulfment | Trench box in place; ladder present; competent person inspects daily | Engineering + Administrative | Competent Person |
| 5. Install utility pipe | Struck-by pipe; strain injury | Use mechanical assist for heavy pipe; clear footing | Engineering + Administrative | Crew Lead |
| 6. Backfill and compact | Trench collapse during backfill; equipment proximity | Remove workers before backfill begins; spotter required | Administrative | Foreman |
Notice how steps 3 and 4 rely on engineering controls (the trench box) rather than leading with PPE. Hard hats and high-visibility vests are still required throughout, but they appear as a baseline, not the primary control. That’s the hierarchy of controls working as intended. For more JSA form examples across different construction tasks, the linked guide includes additional filled samples.
How to document, store, and update JSAs
A signed JSA is only useful if it’s accessible, auditable, and current. Documentation best practices start with the minimum required fields: task description, date, step-by-step breakdown, hazards, controls, and signatures from every crew member who attended the briefing. Time-stamps matter because they establish that the JSA was completed before work started, not after.
Paper vs. digital: the real tradeoffs
| Factor | Paper JSA | Digital JSA |
|---|---|---|
| Accessibility on site | Immediate; no device needed | Requires phone, tablet, or laptop |
| Offline capability | Always available | Depends on app; some work offline |
| Signature audit trail | Manual; can be lost or damaged | Timestamped; searchable; backed up |
| Storage and retrieval | Physical filing; hard to search | Searchable archive; instant retrieval |
| Version control | Manual; easy to use outdated form | Automatic; previous versions retained |
| Audit readiness | Depends on filing discipline | Consistent; exportable for audits |
Paper works fine for small crews on short-duration tasks. Digital systems earn their keep when you’re managing multiple crews, tracking recurring tasks, or preparing for contractor audits. The top job hazard analysis software options guide covers what features to prioritize when evaluating tools.
When to update a JSA:
- Scope, equipment, or crew changes
- After a near-miss or incident on that task
- When site conditions shift (weather, adjacent work, new hazards introduced)
- Periodically on long-duration tasks, even without a triggering event
Linking JSA signoffs to training records adds another layer of audit readiness. When an inspector asks who was trained on trench safety and who signed off on the JSA before entry, having both records in one place answers the question immediately.
Who should complete a JSA, and when?
The foreman or supervisor leads the JSA. That’s non-negotiable. But the crew who will actually perform the task must be involved in developing it, not just handed a form to sign. Workers identify granular risks that supervisors miss from the planning side.
Who must be present:
- The foreman or lead supervisor for the task
- Every worker who will perform the task
- Affected trades if adjacent work creates interaction hazards
- A competent person for high-risk tasks (excavation, confined space, fall hazards above 6 feet)
When to run a JSA:
- Before any high-risk or non-routine task
- First time a task is performed on a new site
- When a task changes mid-project (different equipment, different crew, different conditions)
- After a near-miss or incident, before resuming work
- When environmental conditions change significantly (rain, wind, temperature extremes)
- At the start of each shift for ongoing high-risk tasks
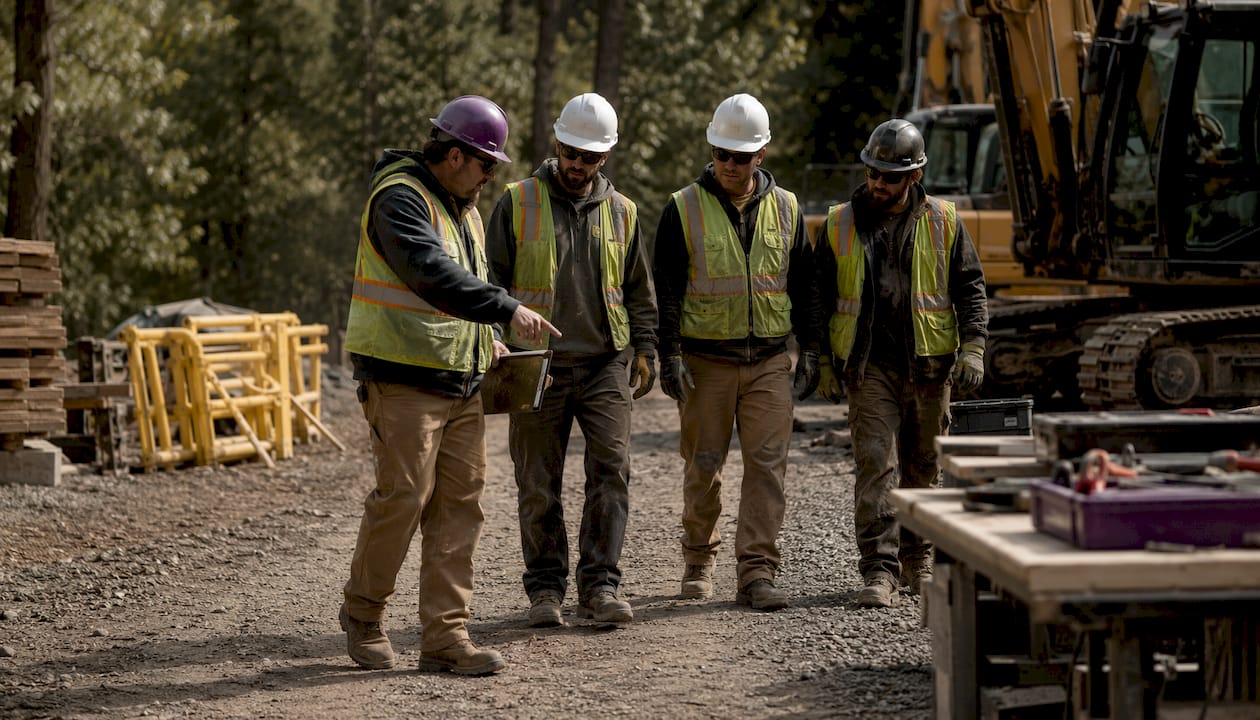
The pre-task walkthrough is worth doing physically, not just verbally. Walk the work area with the crew, point to the hazards identified in the JSA, confirm controls are in place, and get verbal confirmation that everyone understands their role. Then collect signatures. That sequence, start to finish, is what transforms a JSA from a form into a safety tool. Construction workforce hiring dynamics in 2026 mean crews often include workers new to a site or task, which makes that walkthrough even more critical.
Common construction hazards your JSA should address
These are the categories that show up most often in construction incidents and that every JSA should explicitly consider:
- Falls from elevation: Leading cause of construction fatalities. Check for unprotected edges, leading edges, floor openings, and ladder/scaffold conditions. Controls: guardrails, personal fall arrest systems, covers, work sequencing.
- Struck-by objects: Falling tools, swinging equipment, vehicle traffic. Check overhead work, crane swing radius, and site traffic patterns. Controls: exclusion zones, spotters, hard hats, high-visibility vests.
- Caught-in/between: Excavation cave-ins, unguarded machinery, pinch points. Check trench conditions, equipment guards, and proximity to moving parts. Controls: trench boxes, machine guarding, lockout/tagout.
- Electrical hazards: Overhead power lines, temporary wiring, wet conditions. Check line clearances and ground fault protection. Controls: de-energize, maintain required clearances, use GFCI protection.
- Excavation and trenching: Soil classification, surcharge loads, water intrusion. Controls: competent person inspection, sloping, shoring, or trench box.
- Silica and chemical exposure: Cutting, grinding, or drilling concrete and masonry. Controls: wet methods, local exhaust ventilation, respiratory protection as a last resort.
- Overhead and falling objects: Work directly below other trades. Check for falling object hazards and establish toeboards, debris nets, or exclusion zones.
- Site-specific and adjacent-activity hazards: Weather, traffic, simultaneous operations. These are the ones most often missed because they’re not part of the task itself.
Practical tips and common mistakes to avoid
The most common JSA failure is treating it as paperwork. A supervisor fills out the form at the trailer, walks it to the crew five minutes before start, and collects signatures without a real conversation. That JSA is legally present and operationally useless.
What actually makes a JSA effective:
- Run the session at the work face, not the office
- Keep it specific: name the actual hazard, not a category
- Apply the hierarchy of controls before defaulting to PPE
- Verify that controls are physically in place before signing off
- Keep it short enough that crews can absorb it — a 20-step JSA for a 30-minute task is a sign the scope is too broad
Common mistakes that weaken JSAs:
- Over-general controls (“follow safe work practices” is not a control)
- Not updating after a scope or crew change
- Missing sequence conflicts with adjacent trades
- Listing PPE as the primary control when engineering options exist
- Completing the JSA after work has already started
Pro Tip: Before any pre-task briefing, run a 60-second red-flag check: Is every control listed actually in place right now? Is the crew present the same crew listed on the JSA? Has anything changed since the JSA was written? If any answer is no, stop and update before proceeding.
A pre-task plan template can help supervisors build this check into their standard workflow.
Digital tools and templates for JSA documentation
The right documentation tool depends on crew size, task complexity, and how often you face audits or contractor prequalification reviews.
Template types and what they’re best for:
- Simple one-page JSA form: Best for small crews, short-duration tasks, and field use where simplicity matters. Easy to complete, easy to file.
- Modular JSA form: Pre-populated hazard libraries by task type. Faster to complete for recurring tasks; reduces the chance of missing a hazard category.
- Integrated pre-task plan: Combines JSA, toolbox talk, and daily hazard assessment into one document. Best for complex multi-trade operations.
Features to prioritize in a digital tool:
- Offline access (construction sites often have poor connectivity)
- Timestamped signature capture with audit trail
- Searchable archive by task, date, crew, or location
- Linkage between JSA signoffs and worker training records
- Export capability for audits and contractor submissions
Certicerts offers desktop-based certificate and training record management with offline QR verification, making it a practical option for linking JSA signoffs to auditable worker training records. When an auditor asks whether the crew on a confined space entry had current training, a system that connects the JSA signoff to the training certificate answers that question in seconds rather than hours of file searching.
For a broader comparison of software approaches, the construction safety management software guide covers the main tradeoffs between field-first apps and desktop record systems.
Why worker involvement and the hierarchy of controls improve JSA outcomes
The evidence behind JSA effectiveness points to two factors more than any others: who is in the room when the JSA is written, and which controls get selected.
Workers who perform a task daily know where the sequence breaks down, which tools behave unpredictably, and which site conditions create unexpected exposure. A supervisor-only JSA misses that knowledge. OSHA’s guidance is explicit: the people doing the work should help develop the analysis.
On the controls side, the data is equally clear. Engineering controls that physically remove or isolate a hazard are more durable than administrative controls that depend on worker behavior, and far more reliable than PPE that depends on correct use every single time. A guardrail works whether a worker is tired, distracted, or new to the site. A harness only works if it’s worn, fitted correctly, and connected to an anchor rated for the load.
The job hazard analysis guide for construction covers how to apply these principles across the most common construction task types. Combining crew-led hazard identification with engineering-first control selection is the combination that consistently produces JSAs worth using.
Key Takeaways
A JSA is only as effective as the pre-task conversation behind it: crew involvement, engineering-first controls, and a signed, stored record are what separate a real safety tool from a compliance checkbox.
| Point | Details |
|---|---|
| JSA and JHA are the same thing | Both terms are used interchangeably in U.S. construction; OSHA treats them as equivalent. |
| Follow the 4-step process | Select job, break into steps, identify hazards, assign controls using the hierarchy of controls. |
| Involve the crew | Workers identify sequence conflicts and site-specific hazards that supervisors miss from the planning side. |
| Engineering controls come first | PPE is the last resort; controls that remove or isolate the hazard are always more reliable. |
| Document, sign, and update | A timestamped, signed JSA is evidence of due diligence; update it whenever scope, crew, or conditions change. |
The JSA conversation nobody talks about
There’s a version of the JSA that gets written, signed, and filed without ever changing how anyone works. Safety professionals know exactly what it looks like: the form is technically complete, the signatures are there, and the incident happens anyway because the crew never actually discussed it.
The JSAs that change behavior share one quality: they start as a conversation, not a form. A foreman who walks the work area with the crew, points to the trench edge, asks “what happens if that wall moves while you’re down there?” and waits for an answer is running a real JSA. The form is just the record of that conversation.
What often gets overlooked is how much the crew’s input changes the controls chosen. A supervisor planning a roof flashing task from the trailer might list “personal fall arrest system” as the primary control. The roofer who’s done that specific detail before knows the anchor points on that roof section are inadequate for the task and will say so, if asked. That’s the difference between a JSA that prevents a fall and one that documents the hazard after the fact.
The other underrated element is frequency. A JSA written once for a task that runs three weeks on a dynamic site is outdated by day three. Conditions change, crews rotate, equipment gets swapped. The teams that treat the JSA as a living document, revisiting it at each shift or whenever something changes, are the ones with the incident records worth talking about.
Authoritative sources, templates, and downloads
The following resources are the primary references for JSA practice in U.S. construction. Use them to build your forms, train your supervisors, and stay current with OSHA expectations.
- OSHA Job Hazard Analysis (OSHA3071): The foundational OSHA publication on hazard identification and control. Includes a blank JHA template and a completed example.
- OSHA JHA Worksheet: A one-page fillable worksheet with step-by-step instructions for completing a JHA/JSA.
- OSHA Hazard Assessment and JSA Guide: Detailed guidance on the four-step process, worker involvement, and the hierarchy of controls.
- OSHA Hierarchy of Controls reference: The official framework for selecting controls in order of effectiveness.
- Hawaii HIOSH Job Hazard Analysis overview: A clear, accessible breakdown of the JHA process with practical guidance on prioritizing tasks.
- INGAA JSA format guidance: Recommended JSA format with field-by-field content suggestions and update trigger guidance.
- CertiCerts JSA form examples: Practical sample JSA layouts for construction tasks, with guidance on field structure and OSHA alignment.
- CertiCerts downloadable JHA form PDF: A ready-to-use JHA/JSA form with OSHA context and instructions for field use.
For organizations that need to store JSA signoffs alongside worker training records and generate audit-ready reports, Certicerts provides desktop-based certificate management, offline QR verification, and compliance tracking built for construction and safety professionals.